How to setup Call Paging in Gamma Horizon

In this guide, we explain everything you need to know about Call Paging in your hosted telephone system, Gamma Horizon.
Call Paging is a feature within Horizon that allows a user to call numerous users simultaneously with one-way audio (i.e. only the caller can speak). Once a call is placed, then all handsets set up to receive a call in the call paging group will be answered automatically on the loudspeaker.
Note: Call Paging only works for users that use handsets and not soft clients.
Setup Call Page Group
Before you start to set up your Call Page Group, you need to make sure that you have a Call Page Group Add-on to do this. This is done by completing the following actions:
- Log into the Gamma Portal and go to Provisioning and Service Management, Hosted, Horizon and Horizon Manage Company.
- Select your account and locate the company that you want to set up a Call Page Group.
- Using the Actions drop-down, select Manage Bolt-Ons.
- From here, you can see what bolt-ons you have and how many are currently in use. If you need to add any more Call Page Group add-ons, if you scroll to the bottom of the page and click Add More Bolt-ons, and then you can add as many bolt-ons as you need by adding against Page Group.
Step 1
Log into the Gamma Portal and go to Provisioning and Service Management, Hosted, Horizon and Horizon Manage Company.
Step 2
Select your account and log in to the company you want by using the Actions button to select Login to Horizon.
Step 3
Click the Call Groups option and then select Page Group. On the Page Group page, click Add.
Step 4
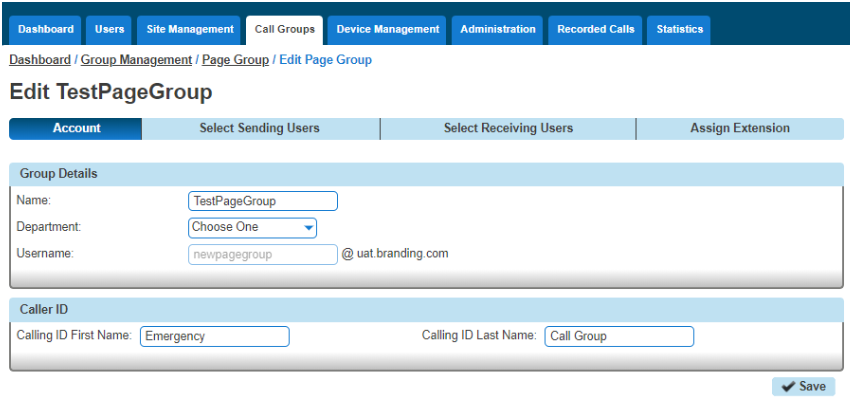
You will now be in the wizard for Call Page Groups. On the first page, you will be setting up the following:
- Site - the site that the Call Page will be used for. All the users of the Call Page Group will be on this site.
- Group Details - enter the name, username and department that you'd like the group to be assigned to. This is so that you can quickly identify the group if you ever need to edit or delete the group.
- Caller ID - this will be displayed on the handset when the Call Page Group is used.

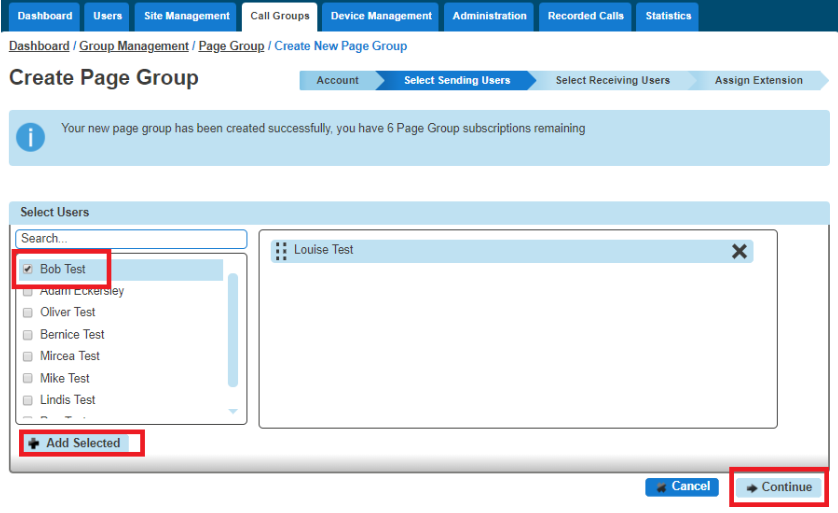
Step 5
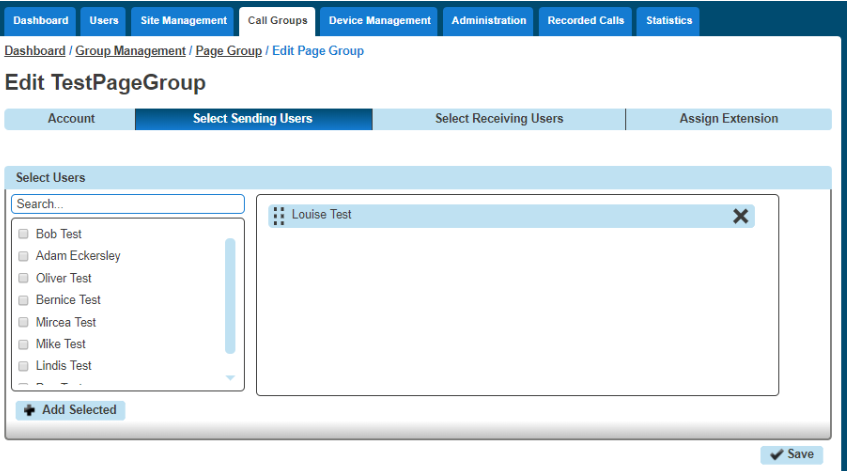
You can now select your Sending Users. These users can make a call from this group to those Receiving User
Add everyone that you want to be able to send a call page and then +Add Selected, and once all users are in the right-hand table, you can click Continue
If you have added a user in error, you can use the white "X" next to the user's name.
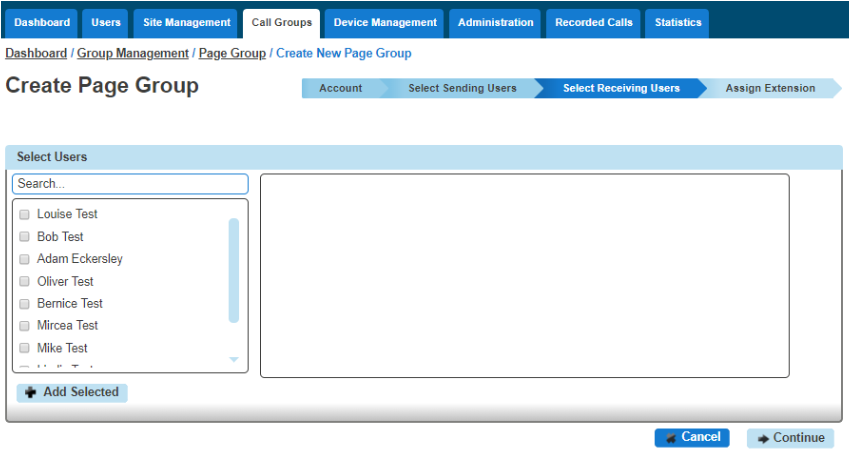
Step 6
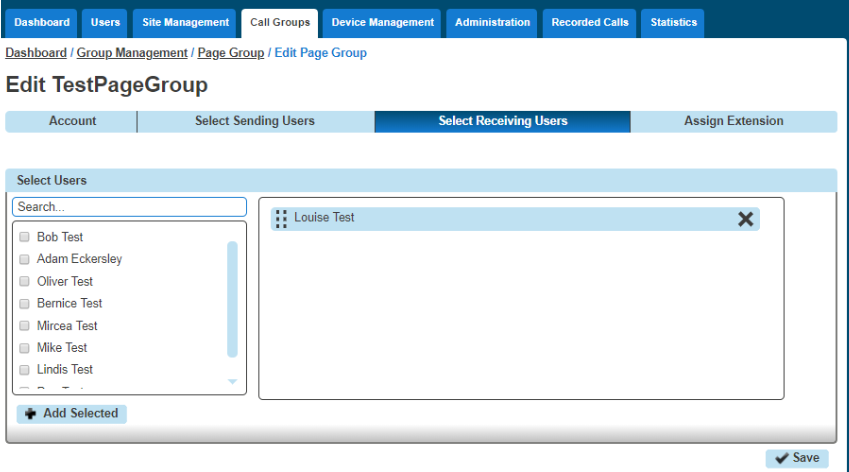
You can now select the Receiving Users, These will be the people that get the call page when the call page extension is dialled.
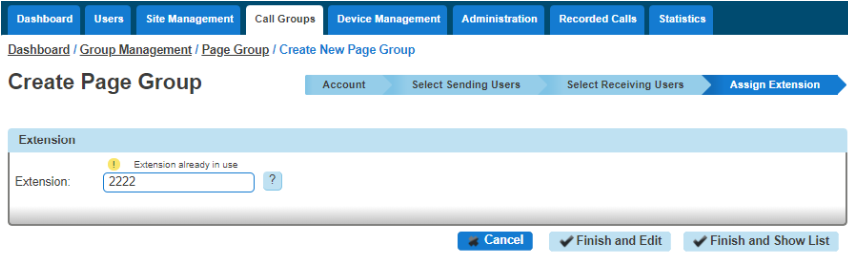
Step 7
Now you should give the group a unique extension number so that when it is dialled by one of the Sending Users, a call is initiated to all the Receiving Users in the group.
If you click Finish and Edit, this will save the Call Page Group that you've just configured and take you back to the start of the wizard Account so you can edit the group as you see fit.
If you click Finish and Show List, this will take you back to the Page Group page within the Horizon Portal, and you will now see your new Call Page Group.
Edit a Call Page Group (including Add/Removing Users)
Step 1
Log into the Gamma Portal and go to Provisioning and Service Management, Hosted, Gamma Horizon and Horizon Manage Company.
Step 2
Select your account and log in to the company you want by using the Actions button to select Login to Horizon.
Step 3
Click the Call Groups option and then select Page Group. On the Page Group page, click Edit next to the Call Page Group you wish to edit.
Step 4
Using the links at the top of the page, you can edit the following:
Account
- Group Details - you change the name and department
- Caller ID - this will be what is displayed on the handset when the Call Page Group is used.
Select Sending Users
- Add new users by clicking the +Add Selected button.
- Remove users by clicking the white X next to the user.
Select Receiving Users
- Add new users by clicking the +Add Selected button.
- Remove users by clicking the X next to the user.
Assign Extension
- Change the Extension number of the Call Page Group.

Removing Users
Step 1
Log into the Gamma Portal and go to Provisioning and Service Management, Hosted, Horizon and Horizon Manage Company.
Step 2
Select your account and log in to the company you want by using the Actions button to select Login to Horizon.
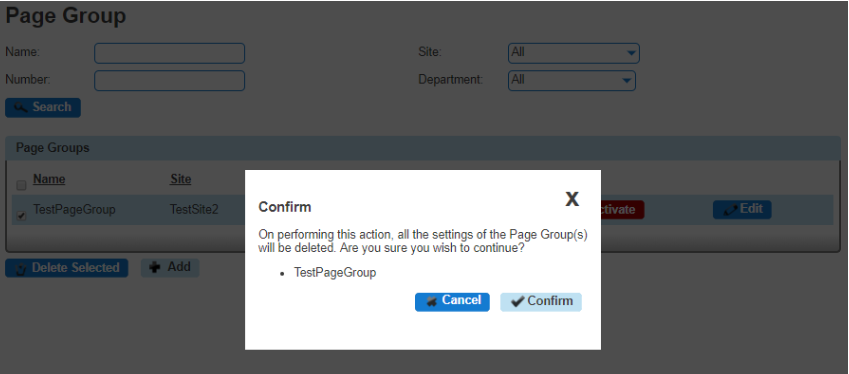
Step 3
Click the Call Groups option and then select Page Group. From here, select the Call Page Group that you want to delete (you can select multiple call page groups to delete) and then hit the Delete Selected button. Click on the Confirm button to confirm the deletion.